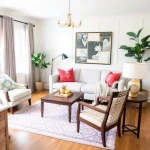
Level-up your home without draining your wallet. This weekend warrior guide breaks down smart budgeting, easy DIY upgrades, practical tools, and pro tips every US homeowner should know. Create more for less with confidence, clarity, and creativity.

How to Master Budget DIY Home Projects: A Weekend Warrior's Guide
Did you know the average kitchen renovation costs over $25,000? Yet countless homeowners transform their spaces with budget DIY home projects for a fraction of that price.
The secret isn't an unlimited bank account or professional-level skills. Instead, it's knowing which affordable home renovation projects deliver maximum impact with minimal investment. From quick low-cost home decor updates to weekend DIY home improvement tasks, transforming your living space doesn't require emptying your savings account.
Fortunately, you don't need specialized training or expensive tools to get started. This guide breaks down easy home projects that even first-time DIYers can tackle during a weekend. We'll cover everything from simple hardware swaps and paint transformations to furniture makeovers and outdoor upgrades that dramatically enhance your home's appearance and functionality.
Ready to roll up your sleeves and turn your home improvement dreams into reality without breaking the bank? Let's dive into these weekend-friendly projects that deliver professional results on a DIY budget.
Table of contents [Show]
- Start with Small Wins
- Start with Small Wins
- Paint Projects That Transform
- Paint Projects That Transform
- Furniture and Decor Makeovers
- Furniture and Decor Makeovers
- Smart Storage and Organization
- Smart Storage and Organization
- Outdoor Upgrades on a Budget
- Outdoor Upgrades on a Budget
- Functional Fixes That Add Value
- Functional Fixes That Add Value
- Conclusion
- References
Start with Small Wins
Transforming your home doesn't always require major renovations. Small, strategic updates can create significant visual impact with minimal time and expense. These beginner-friendly projects require few tools and limited DIY experience, yet deliver professional-looking results that can completely refresh your space.
Start with Small Wins

Replace outdated light fixtures
Lighting can completely change a room's atmosphere and is surprisingly simple to update. With just 20 minutes and approximately $40, you can transform your home's appearance with a new light fixture [1]. Modern, flush-mount designs like schoolhouse-style fixtures offer both function and style.
Before starting, gather these basic tools:
Screwdriver
Wire connectors
Voltage tester
Ladder
Safety comes first when working with electricity. Always turn off power at the circuit breaker before beginning any electrical work [2]. Confirm the electricity is no longer flowing using your voltage tester. After removing decorative pieces from the existing fixture, carefully disconnect the wiring - you should see three sets of wires: black (line), white (neutral), and green or copper (ground) [2].
When connecting your new fixture, match black wire to black wire and white wire to white wire, securing connections with wire connectors [2]. Push wires back into the electrical box and follow the manufacturer's assembly instructions. Once fully installed, return to the circuit box to restore power.
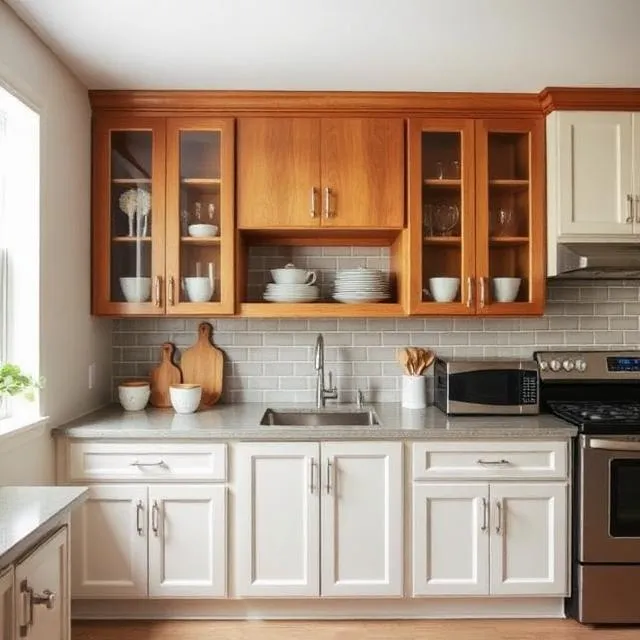
Upgrade cabinet hardware
Cabinet hardware functions as jewelry for your kitchen or bathroom. This quick update can make stock cabinetry feel more custom or elevate built-ins without breaking your budget [3]. A simple white kitchen instantly becomes glamorous with the addition of brushed gold knobs and pulls [1].
Before purchasing new hardware, measure the width of your existing cabinet pulls [1]. Standard sizes include:
96mm (~3-3/4 inches)
128mm (~5-1/16 inches)
160mm (~6-5/16 inches)
3 inches (~76mm) [3]
This project requires minimal tools - typically just a screwdriver. Remove the old hardware, then install the new pieces, being careful to sand and touch up any small dings or scratches that may occur during removal [1]. For a modern look, consider matte black against light cabinetry or warm brass tones against dark wood [3].
Furthermore, mixing hardware styles can create visual interest. Some designers use different finishes for perimeter cabinets versus islands, or combine knobs and pulls throughout the space [3]. This affordable home renovation typically takes just minutes yet refreshes the look of your cabinets instantly.
Install a new shower head
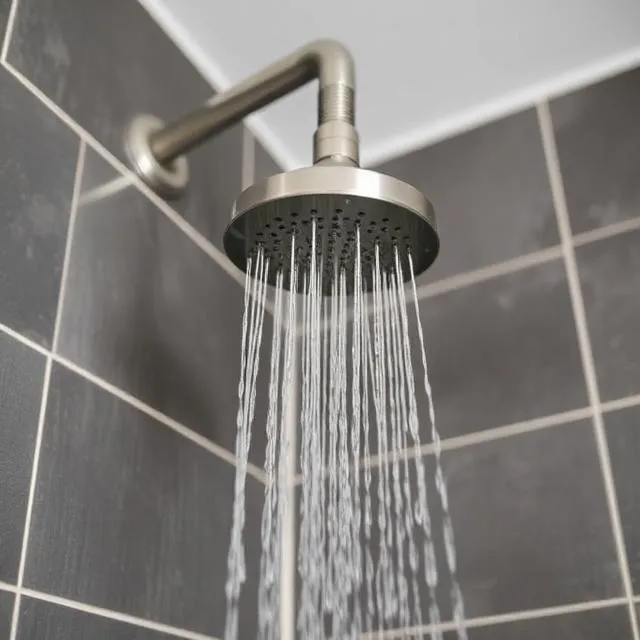
For less than $50, you can recreate a high-end bathroom look with a new shower head [1]. A matte black rain head with matching extension arm offers both style and improved functionality over older models.
To complete this easy home project, you'll need:
New shower head
Teflon thread-sealing tape
Adjustable wrench or channel lock pliers
Clean rag or towel [4]
Start by ensuring the water is turned off [4]. Wrap a cloth around the shower arm to prevent scratching, then use the wrench to loosen the old shower head by turning counterclockwise [4]. Once removed, clean the shower arm threads with an old toothbrush to remove buildup or old tape [4].
Next, wrap three loops of Teflon thread-sealing tape clockwise around the clean threads [4]. Hand-tighten your new shower head, then secure it with the wrench - but avoid overtightening [4]. Finally, turn on the water to check for leaks.
These small victories build confidence for larger projects while providing immediate gratification. Each upgrade costs under $50 yet delivers noticeable improvements to your home's appearance and functionality. By tackling these budget DIY home projects first, you'll develop skills while creating momentum for more ambitious renovations.
Paint Projects That Transform
Paint stands as the most powerful tool in a DIYer's arsenal, offering dramatic transformations at a fraction of renovation costs. One gallon of quality paint typically costs between $20-$50, yet can completely change how a space feels and functions.
Paint Projects That Transform
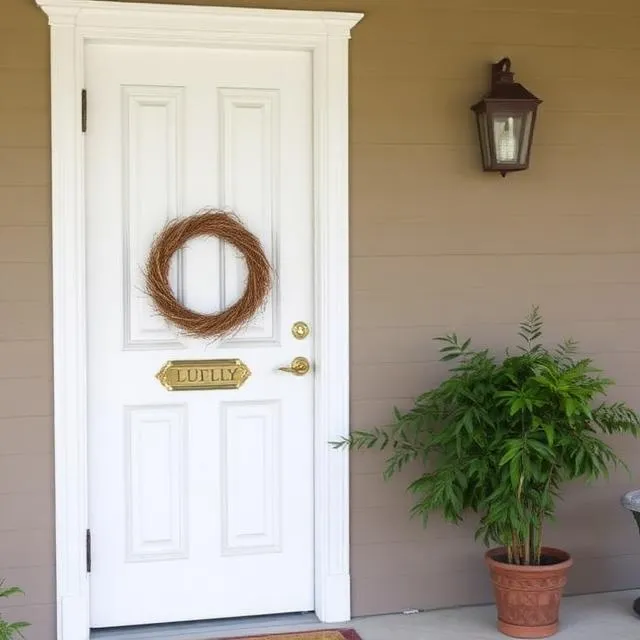
Paint your front door
Nothing enhances curb appeal faster than a freshly painted front door. This affordable home renovation takes just one day to complete and makes an immediate statement about your home's personality.
For optimal results, choose exterior-specific paint that withstands weather conditions. Semi-gloss latex exterior paint remains the most popular choice for front doors as it's durable and easy to clean [5]. Consider experimenting with bold colors - one homeowner found a trendy "Gallery Green" by exploring the trend section at their paint store [6].
To achieve professional-quality results:
Check weather conditions - aim for temperatures between 60-75 degrees with low humidity [5]
Remove door hardware or protect it with painter's tape (or aluminum foil for complete coverage) [7]
Clean thoroughly with a degreasing cleaner to remove built-up grime [7]
Lightly sand with a sanding sponge and wipe away dust [7]
Apply paint in a specific order: recessed areas first with an angled brush, followed by flat areas with a mini roller [7]
Remember that exterior door paint dries faster in higher temperatures, lower humidity, and direct sunlight. Consider painting early morning or late afternoon for best results [7]. Allow 24-48 hours drying time between coats for a flawless finish.
Refresh kitchen cabinets
Cabinet painting delivers the biggest visual impact for your investment. Rather than spending thousands on replacements, a cabinet refresh costs under $100 in materials and transforms your entire kitchen.
Prior to beginning, determine whether your cabinets have latex or oil-based paint by rubbing with alcohol - if color transfers to the rag, it's latex [8]. For previously painted cabinets, thorough preparation ensures professional results:
First, remove all doors, hardware and thoroughly clean with a degreaser to eliminate kitchen grease buildup [2]. Subsequently, sand surfaces with an orbital sander to create a slightly roughened surface for paint adhesion [2]. Although you don't need to strip down to bare wood, this crucial step ensures paint durability [2].
For optimal adhesion, apply a bonding primer such as Zinsser Cover Stain [2]. Once primer dries, sand again with 220-grit sandpaper between each coat [2]. Most cabinets require two coats of primer and three coats of paint for perfect coverage [2].
Consider Sherwin-Williams Emerald Urethane Trim Enamel, specifically designed to withstand kitchen wear and tear [2]. Apply using an angled brush for detailed areas and a mini roller for flat surfaces to achieve a smooth, professional finish [2].
Add color to a bathroom or bedroom
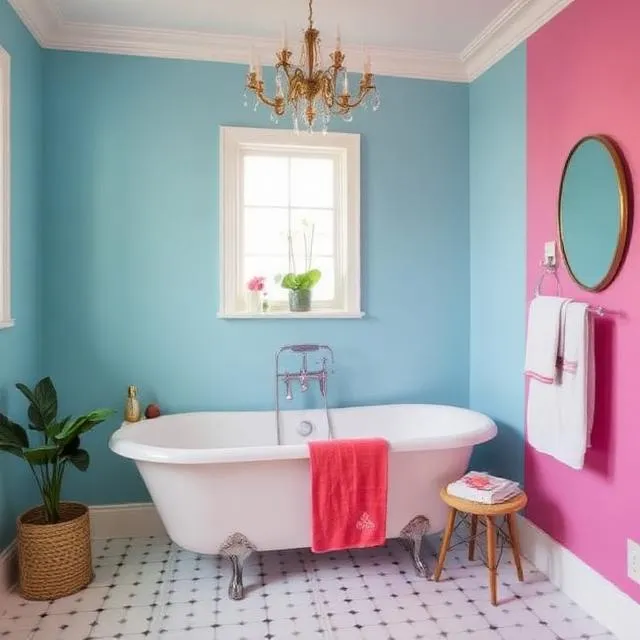
Bathrooms and bedrooms offer perfect canvases for color experimentation at minimal cost. One homeowner completely transformed their beige bathroom with paint for approximately $400, creating a luxury spa feel without actual remodeling [9].
Paint allows you to:
Create focal points by painting single walls
Add architectural interest with painted ceilings (a blush pink ceiling adds warmth without overwhelming) [10]
Update shower tile with specialty paints designed for bathroom surfaces [9]
Paint sometimes requires elbow grease but rewards with extraordinary results. As one experienced DIYer notes, "These types of projects aren't hard and aren't expensive, but boy oh boy, do they make a world of difference!" [11]
For maximum impact with minimal investment, consider painting interior doors colors other than white. This simple change customizes your space and creates the appearance of more expensive construction [10]. Essentially, paint allows you to create designer looks that would otherwise cost thousands in renovations.
Furniture and Decor Makeovers

Giving new life to old furniture and creating custom decor doesn't require deep pockets or professional skills. Second-hand furniture often has better construction than today's mass-produced items, making it perfect for transformation into one-of-a-kind pieces that reflect your personal style.
Furniture and Decor Makeovers
Refinish a thrifted table or dresser
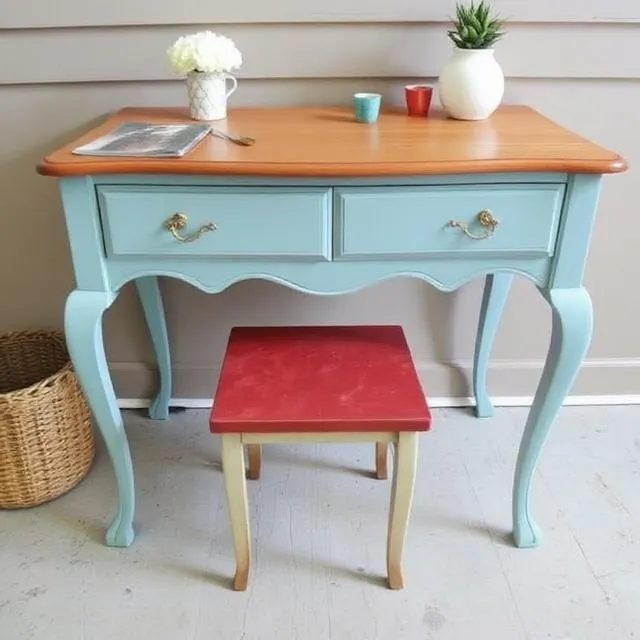
Quality second-hand furniture becomes extraordinary with proper refinishing. When hunting for pieces to upcycle, look for solid wood construction rather than particle board. Check for dovetail joints and substantial weight as indicators of quality [3]. These well-made pieces often need just a little TLC to shine again.
Before diving into refinishing, prepare your workspace properly. Choose a well-ventilated area, preferably outdoors, and cover surfaces with drop cloths to prevent stains [12]. Begin by thoroughly cleaning the piece with sugar soap or TSP (tri-sodium phosphate) and allow it to dry completely [13]. Next, inspect for imperfections – fill any scratches or holes with wood filler before moving to the sanding stage [12].
For the actual refinishing process, you have several options:
Sanding: Start with coarse 80-grit sandpaper to remove the existing finish, then progress to finer 120-grit and finally 180-grit for smoothness [12]
Chemical strippers: Apply to loosen old finishes, then scrape away – though non-toxic options like QCS (Quick, Clean, Save) are better than harsh chemicals [14]
Heat guns: Useful for softening stubborn finishes, but require careful handling [12]
After removing the old finish, decide whether to stain or paint. Staining showcases natural wood grain, whereas painting allows for creative color choices [12]. Finish with a protective sealer or varnish for durability. One refinisher noted, "Old furniture is often better made than equivalent flat-packed furniture today and with a little bit of time, love and care, you can create a completely unique piece" [3].
Create a no-sew cushion or curtain
Fabric transformations needn't require sewing skills. Iron-on adhesive tape (available at craft stores for approximately $2-3 per roll) makes creating custom curtains and pillow covers remarkably simple [4]. This fusible webbing activates with heat, creating strong bonds between fabric pieces.
For no-sew curtains, measure your window and add 12 inches to accommodate the rod pocket and bottom hem [4]. Cut your fabric accordingly, then:
Create side hems by folding edges over once (or twice for cleaner edges)
Insert iron-on tape between layers and press with a hot iron
Fold the top edge over about 3 inches to form the rod pocket
Secure with iron-on tape, creating enough space for your curtain rod to slide through easily
For pillow covers, select fabric wide enough to wrap completely around your pillow insert with a few inches of overlap [4]. Create the envelope opening by hemming both sides of the overlap, then turn the fabric inside-out and use iron-on tape to secure the top and bottom seams. Consider doubling up on tape for stronger bonds where needed [4].
Hang a gallery wall with budget frames
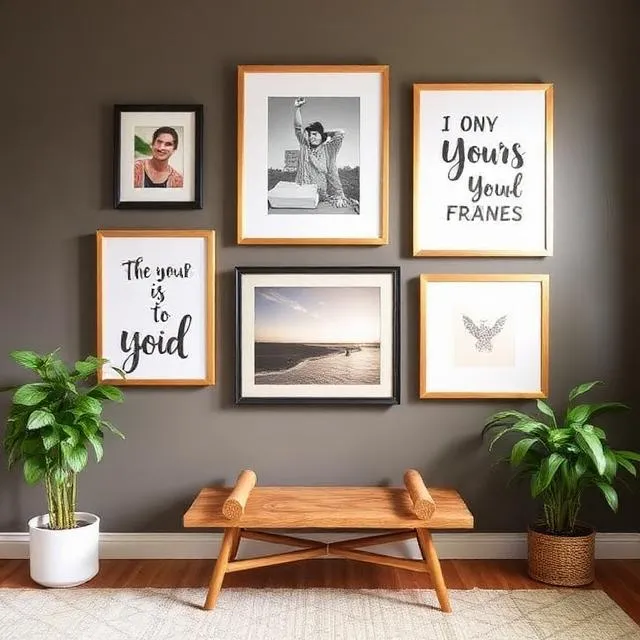
Gallery walls deliver maximum visual impact with minimal investment. Creating one requires thoughtful planning rather than expensive materials. Begin by choosing a cohesive color palette for your frames and art to maintain a curated look [15].
For truly budget-friendly frames, explore these sources:
Thrift stores (often priced around $2 each) [1]
Amazon (sets of 9 frames for under $45) [1]
Dollar stores (perfect for smaller sizes) [1]
Target clearance sections [1]
Before hanging anything, arrange your pieces on the floor within a taped-off area matching your wall dimensions [16]. This allows you to experiment with layouts risk-free. The ideal spacing between frames is approximately 3 inches, creating visual breathing room without excessive gaps [1].
For hanging without multiple wall holes, lay out your arrangement first, snap a reference photo, then transfer to your wall [15]. Consider incorporating different decor elements alongside framed pieces – perhaps a wall hanging, pennant, or decorative fan – to add dimension and visual interest [15].
These furniture and decor makeovers represent significant value. One refinisher transformed a coffee table from a nearby charity shop into a showpiece for her living room [3], demonstrating how budget DIY home projects can dramatically elevate your space without depleting your savings.
Smart Storage and Organization
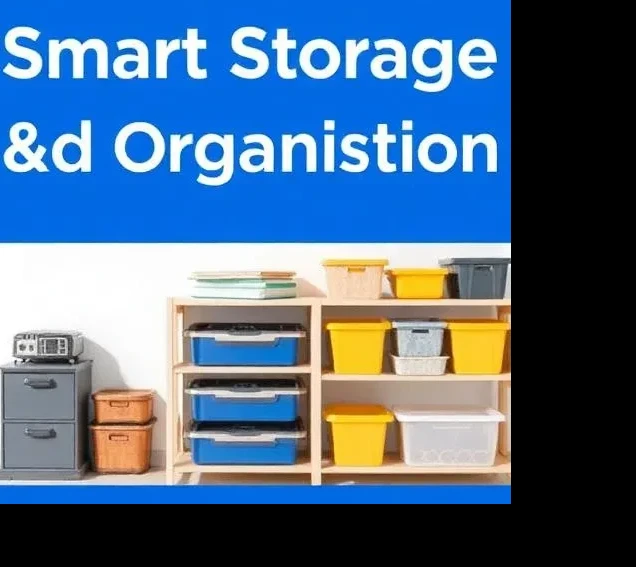
Smart organization solutions elevate both the function and appearance of your home without expensive renovations. Creating designated spaces for everyday items eliminates clutter and streamlines daily routines, making these projects some of the most impactful for improving how your home actually works.
Smart Storage and Organization
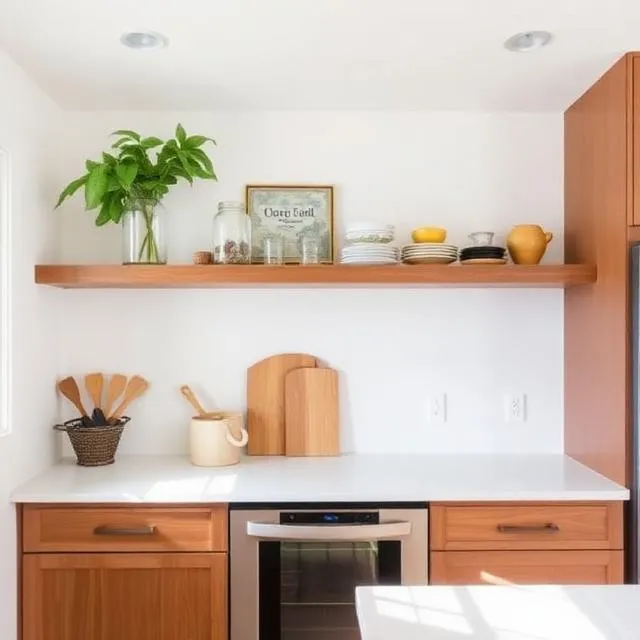
Add floating shelves in the kitchen
Floating shelves add both storage and style to
kitchens while costing significantly less than new cabinetry. These versatile shelves create display space for frequently used items while maintaining an open, airy feeling.
Before installation, carefully measure your space and decide on shelf depth. Standard dinner plates require at least 10-12 inches of depth, so plan accordingly [17]. For a standard kitchen wall, 20 inches above the counter provides comfortable accessibility without interfering with countertop appliances [17].
To create DIY floating shelves that truly "float" without visible brackets:
Mark stud locations first, especially if your walls are tiled
Build a support frame using 2×4s, ensuring they're securely attached to studs
Add center supports approximately 7 inches apart for stability on longer shelves
Attach the decorative outer shell over this support system [17]
Materials remain budget-friendly—most DIYers report spending approximately $70-$100 for supplies to create multiple shelves [18]. For a natural look, consider poplar boards with wood conditioner applied before staining to ensure even absorption [19].
Organize your entryway or closet
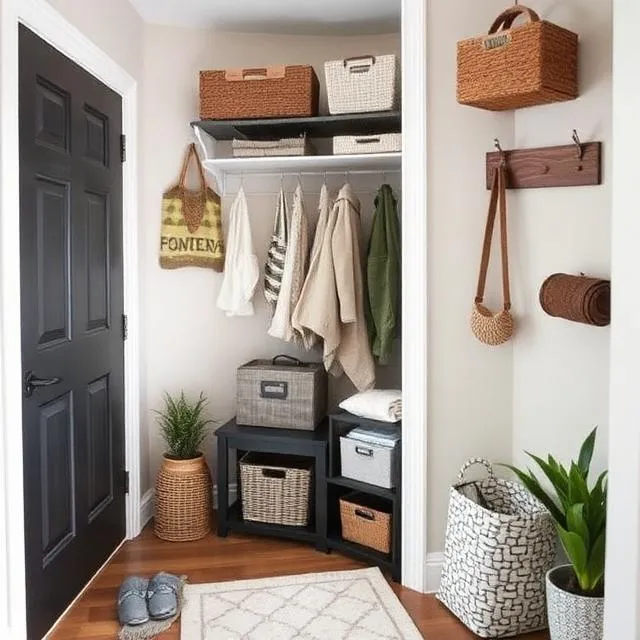
Entryways quickly become magnets for clutter as items get dropped upon entering the home. Creating an organized entry system prevents frustration and wasted time searching for essentials as you head out the door [20].
Wall hooks offer the most practical solution for hanging items like jackets and bags. Since they allow one-handed hanging (unlike hangers), family members are more likely to use them consistently [20]. Mount hooks at appropriate heights for different family members to encourage everyone to participate in maintaining organization.
For small closets, maximize vertical space with these techniques:
Install shelf dividers to keep stacked items like sweaters from toppling over [7]
Use clear acrylic storage bins for folded clothing to increase visibility [5]
Roll clothes instead of folding flat to maximize drawer space (popularized by Marie Kondo) [5]
Hang multi-level rails at different heights to literally double hanging capacity [5]
Consider adding a command center near your entryway with designated spaces for mail processing, keys, and family announcements [20]. This prevents important papers from getting lost in the shuffle of everyday life.
Use bins and labels for pantry or laundry
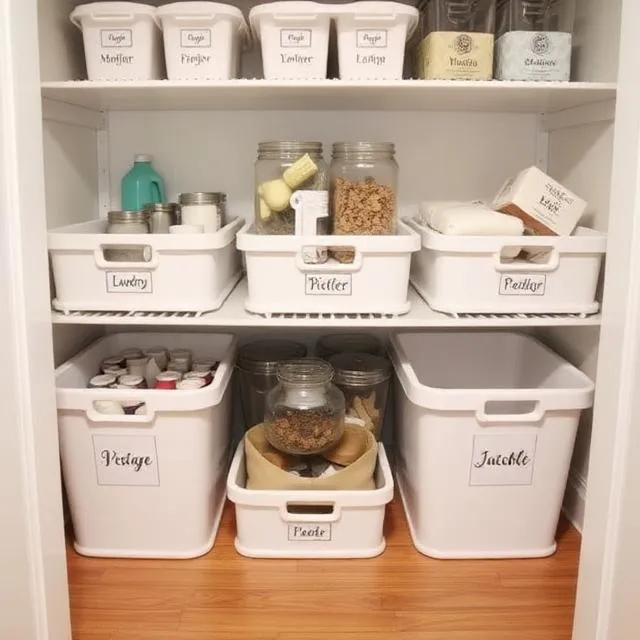
Well-labeled storage bins transform chaotic spaces into functional ones. In laundry rooms, uniformly sized white plastic bins without lids offer easy access while creating visual cohesion [21]. Categorize smaller items logically—batteries in one bin, light bulbs in another—to eliminate searching through mixed contents.
Creating labels doesn't require fancy equipment. Simple printed labels run through a home laminator and attached with hot glue provide a clean, professional look [21]. For a rustic esthetic, chalkboard labels offer flexibility to change categories as needed [22].
Maximize laundry room wall space by installing:
Over-the-door organizers for cleaning supplies
Hanging shoe organizers for small toiletries or laundry accessories [21]
For pantry organization, clear containers allow immediate visibility of contents while protecting food from pests. Label both containers and shelves to maintain the system even as different family members put items away [22].
These smart organization projects deliver both functional and esthetic benefits, making your home work better without expensive renovations. As one organization expert notes, "When I love how our spaces look, I'm more motivated to keep them looking that way" [21] — proving that effective organization systems maintain themselves by encouraging consistent use.
Outdoor Upgrades on a Budget
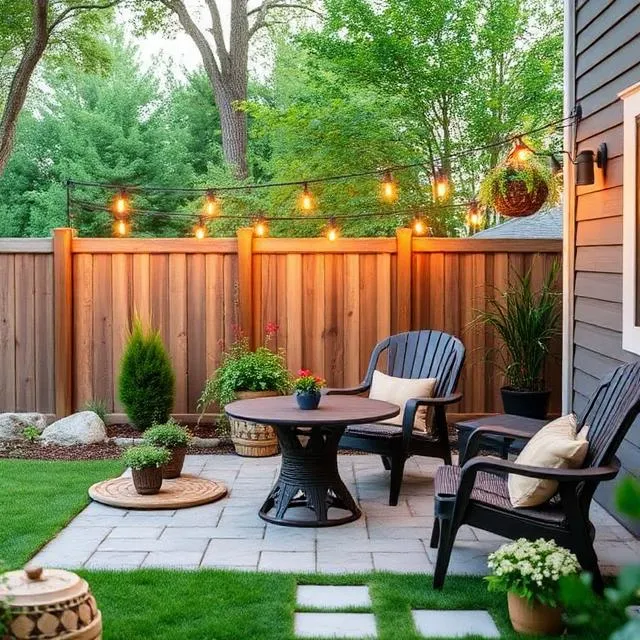
Even your home's exterior deserves attention when considering budget-friendly renovations. Outdoor improvements often deliver impressive visual impact while requiring minimal investment, making them perfect for weekend warriors looking to enhance curb appeal.
Outdoor Upgrades on a Budget
Paint your garage door

Garage doors occupy significant visual space, making them perfect candidates for affordable transformation. A fresh coat of exterior paint costs only the price of materials yet dramatically alters your home's appearance [2]. Most garage door painting projects can be completed in just 3-4 hours, making this a perfect weekend task [8].
For optimal results:
Choose the right finish—flat sheen minimizes surface imperfections, satin provides durability and dirt resistance, semi-gloss works well for doors and trim [23]
Power wash thoroughly to remove dirt before painting
Use exterior-specific paint that withstands weather conditions
Paint section by section on hot days to prevent drying issues
Most importantly, check the weather forecast before starting—temperature, humidity, and direct sunlight all affect paint application and drying [24]. With proper preparation, both costs and time investment remain minimal—many homeowners report completing two coats in about 90 minutes total [2].
Add potted plants or DIY planters

Garden planters inject color and texture into outdoor spaces without permanent landscape changes. Unlike in-ground planting, containers offer flexibility—you can easily move them for optimal sunlight or protect them from harsh weather [25].
Materials affect both esthetics and durability:
Metal planters create modern appeal in metallic finishes
Concrete planters offer rustic charm and exceptional durability
Classic terracotta complements almost any outdoor style [25]
For truly budget-conscious upgrades, repurpose existing materials. Creative DIYers have transformed shipping pallets, wooden crates, and even old furniture into distinctive planters [26]. One innovative homeowner crafted stylish planters from leftover bricks stacked on a simple wooden stand [26].
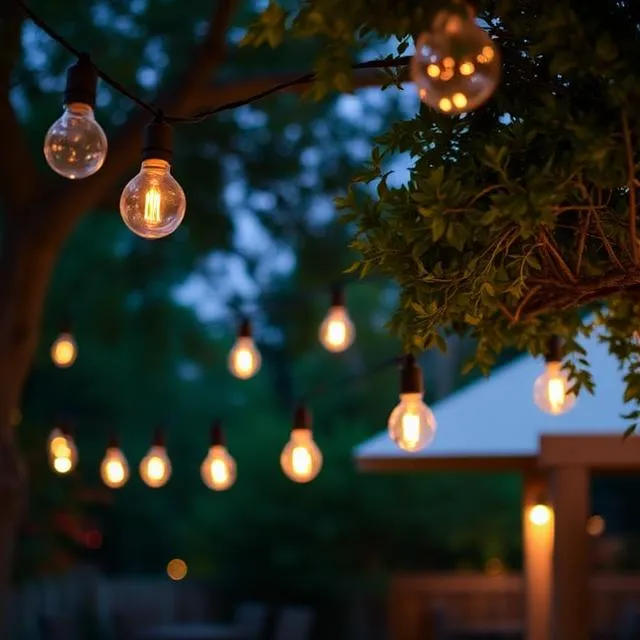
Hang bistro lights for ambiance
Outdoor string lights instantly transform ordinary spaces into magical evening retreats. For secure installation without damage, stainless steel screw hooks provide the ideal solution—they're easy to install, cradle the wire effectively, and leave minimal holes [11].
Consider these alternatives for non-permanent installation:
Zip ties (in matching cord colors) for attaching to deck railings
Fishing line for temporary setups or wicker fences [11]
Proper installation requires planning. First, measure your space using string to map the layout, including any decorative dips. Next, spread lights beneath the installation area before hanging to ensure proper spacing and reduce installation time [11].
Safety remains paramount—ensure lights are plugged into ground-fault circuit interrupter (GFCI) outlets and follow manufacturer guidelines regarding how many strands can be connected [11]. Additionally, maintain lights at least 10 feet above water features for safety [6].
Functional Fixes That Add Value
Small home improvements often yield significant returns. These functional fixes not only enhance daily living but also increase property value without requiring major renovations.
Functional Fixes That Add Value
Install dimmer or motion-sensor switches
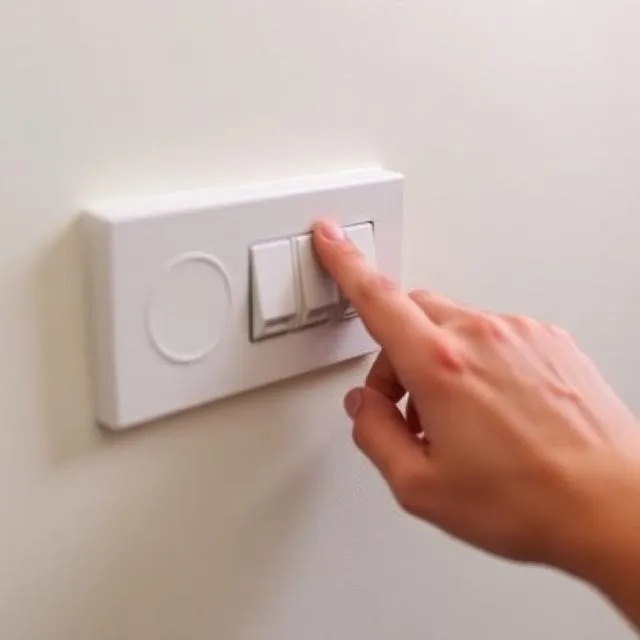
Motion sensor switches eliminate the need to fumble for light switches when your hands are full. Perfect for entryways, garages, and mudrooms, these devices activate lights automatically upon detecting movement. Installation involves replacing existing switches with sensor-equipped alternatives. For optimal results, ensure compatibility with your lighting type before purchasing.
Dimmer switches, conversely, create ambiance while reducing energy consumption. They allow adjustment of brightness levels to suit different activities and times of day.
Weatherstrip doors and windows
Proper weatherstripping acts as a barrier against drafts, moisture, and noise. Moreover, according to the U.S. Department of Energy, this simple fix can reduce heating and cooling costs by more than 20% [27].
For doors, install sweeps at the bottom and seal gaps around the sides and top:
Measure door width before cutting sweeps
Position sweeps against thresholds, ensuring proper contact
Mark and pre-drill screw holes if necessary
For windows, apply V-strips or foam tape along edges where sashes meet frames. Clean surfaces thoroughly before installation for proper adhesion.
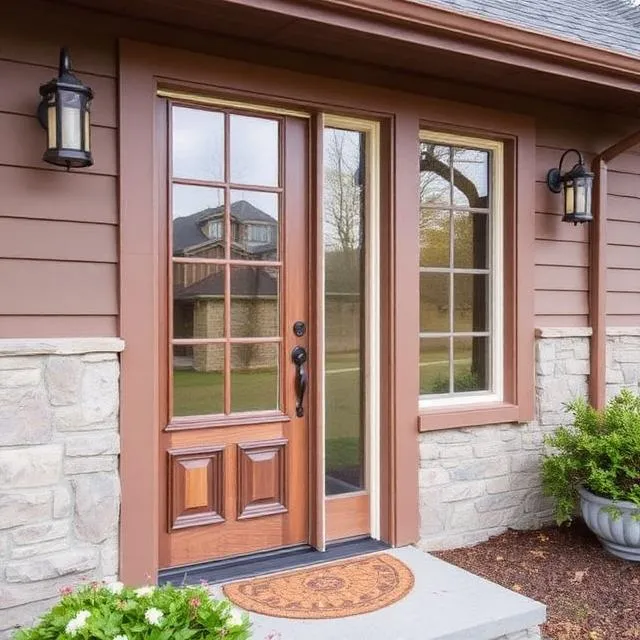
Replace old faucets or door handles
Updating these frequently-touched items refreshes spaces without extensive remodeling. When replacing faucets, first shut off the water supply, then disconnect old fixtures. Apply Teflon tape to connections to prevent leaks [28].
Given that door handles impact both esthetics and function, choose designs that cover existing screw holes. For proper fitting, measure the "backset" (distance between door edge and spindle hole). Most traditional handles require a 45mm backset.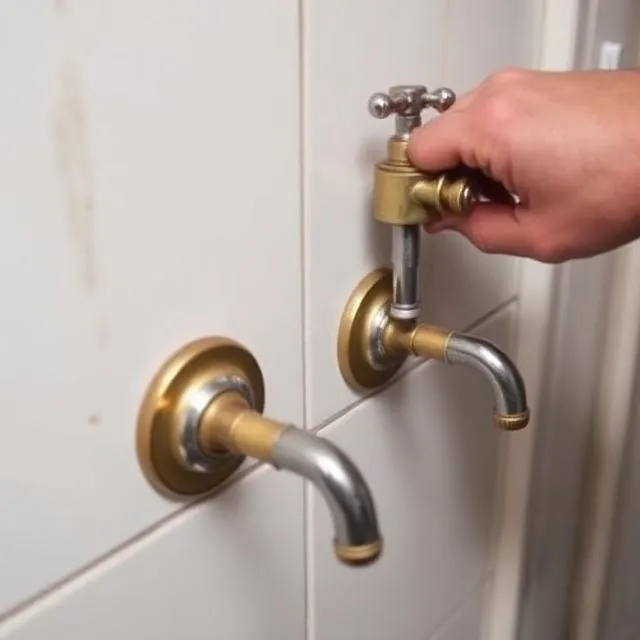
Conclusion
Transforming your home certainly doesn't require a massive budget or professional-level skills. Throughout this guide, we've explored numerous affordable projects that deliver significant impact while keeping costs low. From simple hardware updates to strategic paint transformations, these budget-friendly approaches allow you to create a home that feels custom and reflects your personal style.
Additionally, many of these weekend projects build upon each other. Start with small victories like replacing outdated light fixtures or upgrading cabinet hardware to build confidence. After mastering these basics, you can gradually tackle more ambitious projects such as refinishing furniture or creating custom storage solutions.
The beauty of DIY home improvements lies in their dual benefits. Not only do they enhance your home's appearance, but they also improve functionality and potentially increase property value. Simple fixes like weatherstripping doors or installing dimmer switches reduce energy costs while simultaneously making your space more comfortable and adaptable.
Most importantly, these budget-friendly projects empower you to take control of your living environment without financial stress. Rather than waiting until you can afford a complete renovation, you can make meaningful improvements right now using readily available materials and basic tools.
Remember, successful home transformation happens one project at a time. Whether refreshing your kitchen with painted cabinets or enhancing curb appeal with potted plants, each completed task brings you closer to creating the home you envision. The satisfaction of looking at a space you've personally improved provides rewards that extend far beyond the money saved.
Now that you have this comprehensive guide, pick a project that excites you, gather your supplies, and dedicate a weekend to enhancing your home. Your journey toward a beautifully transformed space begins with that first small improvement – and the results will undoubtedly be worth the effort.

References
[1] - https://www.homeonhazelridge.com/budget-gallery-wall/
[2] - https://thediyplaybook.com/how-to-paint-garage-door/
[3] - https://recycleforgreatermanchester.com/blog/beginners-guide-to-upcycling-furniture/
[4] - https://centsationalstyle.com/2018/06/diy-no-sew-curtains-and-pillow-covers/
[5] - https://www.thespruce.com/small-closet-organization-ideas-7182166
[6] - https://chrislovesjulia.com/how-to-hang-string-lights/
[7] - https://www.nytimes.com/wirecutter/reviews/closet-organizing-ideas/
[8] - https://www.youtube.com/watch?v=J41JNBxPAJ8
[9] - https://porchdaydreamer.com/diy-paint-makeovers/
[10] - https://www.blesserhouse.com/15-ways-to-transform-your-entire-house-with-just-paint/
[11] - https://www.nytimes.com/wirecutter/reviews/how-to-hang-outdoor-string-lights/
[12] - https://www.frenchcreekfarmhouse.com/2023/10/how-to-refinish-wood-furniture.html
[13] - https://www.placesforpeople.co.uk/helpful-guides-tips/my-place-blog/upcycling-wooden-furniture-for-beginners/
[14] - https://thriftdiving.com/furniture-refinishing-tips/
[15] - https://blog.society6.com/5-tips-for-creating-a-budget-friendly-gallery-wall/
[16] - https://stylebyemilyhenderson.com/how-to-make-a-gallery-wall
[17] - https://www.jennasuedesign.com/how-to-diy-floating-kitchen-shelves/
[18] - https://shelfology.com/pages/the-ultimate-guide-to-floating-shelves?srsltid=AfmBOoprsGLeJvu4lafSjndpbccILouLZmxBB8TGTlWIfgVGIFHgWjYq
[19] - https://graceinmyspace.com/how-to-make-diy-floating-kitchen-shelves/
[20] - https://justagirlandherblog.com/organized-entryway/
[21] - https://crazytogether.com/easy-as-pie-laundry-room-organization/
[22] - https://www.pinterest.com/pin/laundry-and-pantry-organization-shelves-with-labeled-baskets--168673948516960015/
[23] - https://www.behr.com/how-to/exterior/how-to-paint-a-garage-door
[24] - https://www.youtube.com/watch?v=t9pKwCS_zqY
[25] - https://www.ikea.com/us/en/cat/outdoor-plant-pots-30436/
[26] - https://www.hgtv.com/outdoors/flowers-and-plants/diy-planter-box-ideas-pictures
[27] - https://www.thisoldhouse.com/doors/21018244/the-essential-guide-to-weatherstripping
[28] - https://www.thisoldhouse.com/plumbing/21017126/how-to-replace-an-old-faucet