Are you tired of constantly watering your beloved plants or worried about over-watering them? Well, worry no more! Today, we're diving into the world of self-watering planters. What's even better? We're going to show you how to build your very own self-watering planter in just 30 minutes.
Spring Home Maintenance: 20 Tasks Every Homeowner Should Do
DIY Self-Watering Planter: Build Your Own in 30 Minutes
DIY Self-Watering Planter: Build Your Own in 30 Minutes
Table of contents [Show]
Introduction
Hey there, green thumbs and creative DIY enthusiasts! 🌱 Are you tired of constantly watering your beloved plants or worried about over-watering them? Well, worry no more! Today, we're diving into the world of self-watering planters. What's even better? We're going to show you how to build your very own self-watering planter in just 30 minutes. Yes, you heard that right! Not only will this project save time and water, but it's also a fun and easy way to enhance your gardening game. So, roll up those sleeves, gather some basic supplies, and let's get started on this quick project that will have your plants thanking you!
Materials Needed
 Image courtesy: Unsplash
Before diving into our fun DIY project, let’s gather everything we need to build our self-watering planter! This will make your gardening experience a breeze and help your plants thrive with minimal effort.
List of Basic Materials
Here’s a simple list to get you started. Most of these materials are affordable and can be easily found at your local hardware or gardening store.
- Plant pot or container: Choose one that suits your style and the size of the plants you want to grow.
- Plastic bottle or shallow container: This will act as your water reservoir. Opt for a bottle that complements the size of your plant pot.
- Wicking material: Cotton rope, strips of clean cotton fabric, or even an old t-shirt can do the trick! This helps draw water from the reservoir to the soil.
- Potting soil: Get a high-quality potting mix suitable for your chosen plants.
- Plants or seeds: Decide what you want to grow! Herbs like basil or mint are great starters.
- Decorative pebbles or gravel: These will not only make your planter look pretty but will also aid with drainage.
Tools Required
Don’t worry about fancy tools; you might already have these at home!
- Drill: A manual or electric drill will work well to make necessary holes.
- Scissors or a Craft knife: Essential for cutting materials like the wicking material and plastic bottles.
- Measuring tape: To ensure your cuts and adjustments are precise.
Optional Add-Ons
Adding a bit of creativity can make your planter extra special. Consider these optional add-ons:
- Paint or stickers: Personalize your planter to fit your home decor.
- Water level indicator: Helpful if you want to keep track of water levels easily.
- Moisture meter: A gadget to measure soil moisture levels, ensuring your plants never go thirsty.
Step-by-Step Guide
Now that we have everything ready, let’s assemble our self-watering planter! This step-by-step guide will walk you through the process like a pro, and in just 30 minutes, you’ll have a smart planter all set up.
Preparing the Planter Base
1. Select the Right Pot: Start by choosing a good-sized pot for your plants. Remember, the container should have enough space to accommodate the growing roots.
2. Drill Drainage Holes: Using your drill, make several drainage holes at the bottom of the pot. This will prevent overwatering by allowing excess water to escape.
3. Insert Decorative Pebbles: Add a layer of decorative pebbles or gravel at the bottom. This step enhances the aesthetic and improves drainage.
Designing the Water Reservoir
1. Prepare the Bottle: Take your selected plastic bottle and cut it into two parts. The bottom half will serve as the reservoir.
2. Create Wicking Holes: Drill or cut holes into the bottle cap and around the neck of the bottle. The wick will pull water through these holes.
3. Position the Reservoir: Place the cut bottle in the center of the pot, with the open end facing up. Make sure it's steady, using pebbles or gravel to hold it in place if needed.
Assembling the Self-Watering System
1. Install the Wick: Thread your chosen wicking material through the holes in the bottle cap. The wick should be long enough to reach the bottom of the reservoir while extending into the soil.
2. Add Potting Soil: Begin filling the pot with potting soil. Ensure the wick is well-positioned within the soil so it can effectively draw water up as needed.
3. Plant Your Greens: Plant your seeds or seedlings into the soil, giving them a gentle pat down to secure them in place.
4. Fill the Reservoir: Pour water into the bottle part to complete the self-watering system. Water will travel through the wick, keeping the soil consistently moist.
5. Decorate & Monitor: Feel free to add any decorative touches to your planter. You might use paints or stickers to give it a personal flair.
And there you have it! Your very own self-watering planter is ready and raring to nurture your precious greenery. Now, you can sit back, relax, and watch your plants thrive with less hassle. Remember to check the water level every now and then; refill as needed, and enjoy a garden that practically takes care of itself.
Happy gardening!
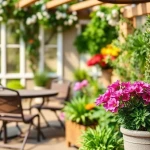
Benefits of a Self-Watering Planter
 Image courtesy: Unsplash
So, you're thinking about diving into the world of self-watering planters? Awesome choice! These nifty inventions not only give your green thumbs a rest but also bring a host of benefits to your gardening game. Let's dive into why these planters are such a fantastic addition to any gardening setup.
Water Conservation
One of the standout benefits of a self-watering planter is its ability to conserve water. Traditional planters require frequent watering, and it's easy to give your plant too much or too little moisture. This often leads to wasted water, but not with a self-watering planter. Thanks to its built-in reservoir, it delivers the perfect amount of water your plants need, exactly when they need it.
- Efficient Water Use: Water is stored in a reservoir and wicked up to the roots as needed, minimizing waste.
- Consistent Hydration: Your plant receives a steady supply of water, which means less evaporation and no runoff.
This efficient water management not only saves resources but also lowers your water bill — talk about a win-win!
Healthier Plants
Healthy plants result in a happier you, right? Self-watering planters ensure your plants are living their best life by providing consistent moisture and preventing the dreaded overwatering or underwatering conundrum.
- Root Health: Proper hydration encourages strong, healthy roots, which means robust, thriving plants.
- Prevention of Disease: Overwatering can lead to root rot and other water-related diseases, while underwatering stresses your plants. The self-regulating nature of these planters keeps such problems at bay.
This setup can make a huge difference, especially for newbies still polishing their green thumb skills. Your plants will thank you, trust us!
Reduced Maintenance
If you're a busy bee or have a tendency to forget your watering schedule, a self-watering planter can be a game-changer. It significantly reduces the overall maintenance required to keep your plants happy and healthy.
- Set It and Forget It: Once you've filled the reservoir, you're free to focus on other tasks for days or even weeks.
- Peace of Mind: Whether you're traveling or just caught up in life's whirlwind, your plants will stay hydrated and content without constant attention.
With these low-hassle beauties, plant care becomes less daunting and more enjoyable. Whether you're an experienced gardener or just starting, a self-watering planter effortlessly fits into—and simplifies—your routine. So, put those worries to rest and enjoy watching your plants grow with ease!
Conclusion
And there you have it! In just 30 minutes, you've transformed a few basic materials into a functional self-watering planter. By taking on this DIY project, you've not only honed your crafting skills but also ensured that your plants receive the optimal hydration they need.
Remember, the beauty of this planter is how simple and efficient it is. Whether you're an occasional gardener or a passionate plant parent, this easy project is a fantastic way to give your green friends the care they deserve.
So go ahead, place your new creation somewhere sunny, fill it with your favorite plant, and enjoy watching it thrive with minimal effort. Happy gardening! 🌿
Build a DIY Self-Watering Planter in 30 Mins
Create a self-watering planter quickly with this easy 30-minute DIY guide.
Transform your gardening game in just 30 minutes with our DIY self-watering planter guide! 🌱💧 Perfect for plant lovers looking for an easy and quick project. Discover step-by-step instructions to build your own and keep your plants thriving effortlessly. Ready to get your hands dirty? Check it out now! #DIY #Gardening #SelfWateringPlanter #EasyDIY #QuickProject #PlanterTutorial 🌿🔧